Posted by Sakshita
Methods to connect to FTP Client, FileZilla
One of the most well-known FTP Client is FileZilla. It is used by most of the people in the industry as it is free, open-source and secure enough to connect to the remote server. It allows user to upload or add files from local directory to the server just by using drag and drop.

Before discussing the methods to connect to FTP Client, you can download FileZilla from FileZilla Download Page. Well I’m using cPanel account with REDSERVERHOST and FTP Client as FileZilla to manage my website related task.
After downloading FileZilla successfully, you can now follow the below given procedure to configure it and connect to the server. You can connect to FileZilla by any of the two given methods.
Method 1. Connect to FileZilla directly.
You can directly connect to FTP Client, FileZilla by following the below mentioned steps.
- Create an FTP Account in cPanel. You can refer to the article how to create FTP Account in cPanel?
- After successfully creating account open your FileZilla.
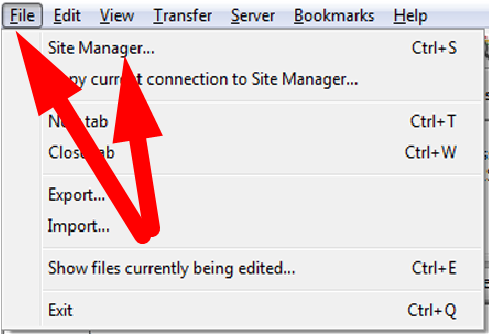
- At the left top corner, you will find FILE option. Click over it.
- Then select Site Manager from the list of available options.
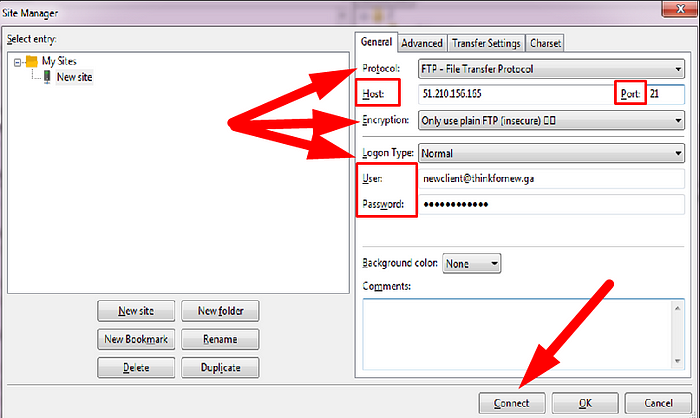
Host: Enter the host name of the server in which you have created your FTP Account.
Port: The default Port for FTP is 21.
Encryption: Choose the encryption type from the drop down button. It is recommended to always choose Only use plain FTP.
Login type: Select Login type as normal from the drop down button.
User: Enter the username which you have created in your cPanel account.
Password: Enter the same FTP Account password which you have entered in cPanel. Then click over Connect.
You have now successfully connected to your FTP Client, FileZilla.
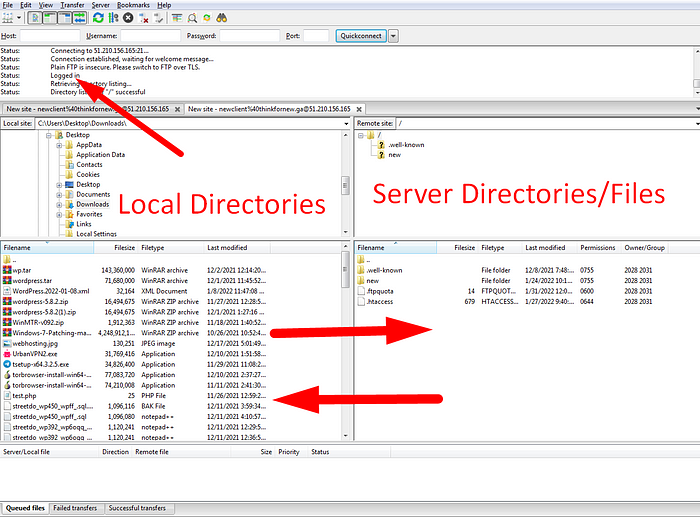
Now, the above mentioned procedure is the one method to connect to your FTP Client , FileZilla. But here I will explain another method to do the same.
Method 2. Using FTP Configuration File.
As you know, that here we are using FileZilla as a FTP Client to manage website related task. So, let’s learn how can you connect to FileZilla by using FTP configuration file.
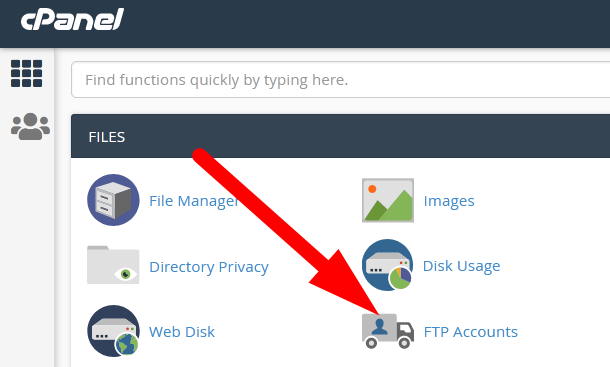
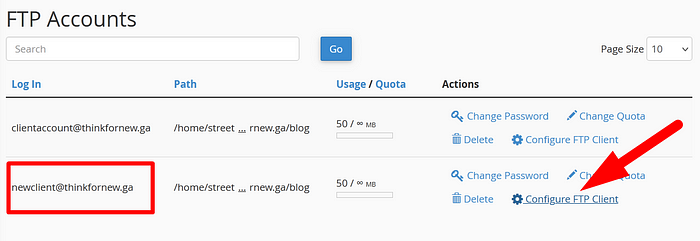
3. Select the account for which you want to connect to FileZilla and then click over Configure FTP Client.

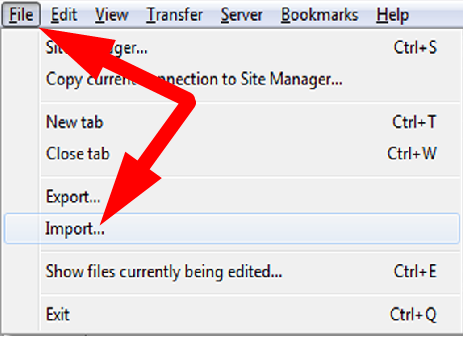
6. Click over File at the left top corner and then select Import from the list.
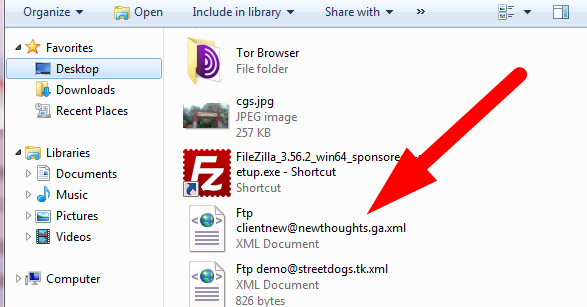
7. Select the downloaded file to import and proceed.
8. Now, again click over File option in FileZilla and then select Site Manager.

Now, the procedure mentioned above will clearly make you understand the methods to connect to FileZilla. You can also check for the related video at blog.redserverhost.
We will learn more about cPanel and its features. If you have any queries related to web hosting and cPanel then you can ask. Learn more and explore more!
Comments